Freezer Bean and Rice Burritos That Reheat Evenly
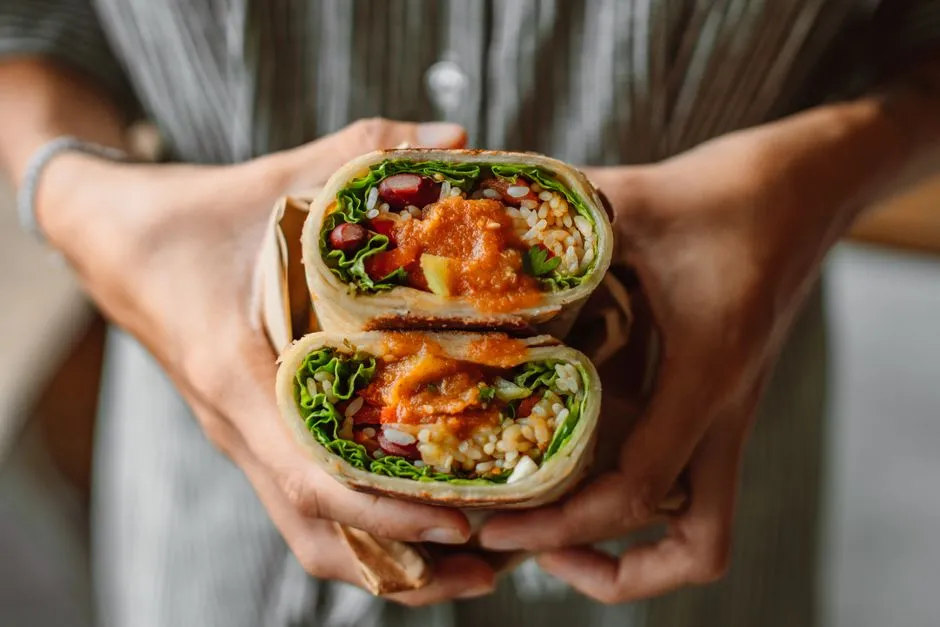
- Cool the filling before asking the tortilla to contain it
- Recipe card
- Ingredients
- Equipment
- 1. Cook and cool the rice
- 2. Thicken the salsa mixture
- 3. Cool the filling rapidly
- 4. Set up eight equal portions
- 5. Roll tightly without tearing
- 6. Wrap, label, and freeze
- Microwave from frozen
- Oven from frozen
- Reheat after refrigerator thawing
- Pack for work
- Variations
Cool the filling before asking the tortilla to contain it
Freezer burritos become soggy when warm rice steams inside the wrap, salsa brings more water than flavor, and fresh toppings release liquid during thawing. This recipe fixes the sequence: cook a thick bean-and-corn filling, cool it and the rice rapidly in shallow containers, then build eight burritos with measured portions.
Cheese stays inside. Avocado, lettuce, sour cream, and fresh salsa wait until after reheating. The center of every reheated burrito must reach 165°F (74°C); a crisp edge does not testify for a cold middle.
Recipe card
- Yield: 8 burritos
- Prep: 30 minutes, plus cooling
- Stovetop cook: about 13–17 minutes
- Freeze: individually, then bag
- Best-quality window: within 3 months frozen at 0°F (-17.8°C) or below
- Reheat endpoint: 165°F (74°C) throughout
Ingredients
- 8 large flour tortillas, 10 inches (25 centimeters) across
- 3 cups cooked brown or white rice (typically starting with about 1 cup dry; use the package yield to reach the measured cooked amount)
- 1 can black beans, 15 ounces (425 g), drained and rinsed
- 1 cup corn kernels, thawed if frozen
- ½ cup (120 mL) tomato salsa
- 1 tablespoon (15 mL) olive oil
- ½ small yellow onion, about 2½ ounces (70 g), finely diced
- 1 garlic clove, minced
- 1 teaspoon (5 mL) ground cumin
- ½ teaspoon (2.5 mL) smoked paprika
- ¼ teaspoon (1.25 mL) fine salt, plus more only after tasting
- 1½ cups shredded Cheddar or Monterey Jack cheese, about 6 ounces (170 g)
For serving after reheating: fresh salsa, avocado, lettuce, cilantro, lime, or sour cream, all optional and stored according to their labels.
Allergens: base recipe contains wheat and milk. Salsa may contain other allergens. Check labels and prevent cross-contact for your needs.
Equipment
- large skillet
- colander
- food thermometer
- two shallow cooling containers or sheet pans
- 8 pieces parchment paper
- freezer bag or sealed freezer container
- permanent label
Foil is optional for oven reheating but must be removed before microwaving unless the microwave manufacturer provides explicit directions that permit it.
1. Cook and cool the rice
Cook rice according to its package until you have 3 level cups. Spread it immediately in a shallow container no deeper than about 2 inches (5 centimeters) so steam can escape and the food cools quickly.
Do not rinse cooked rice in the sink or leave the pot at room temperature for hours. USDA leftovers guidance says to divide large amounts into shallow containers and refrigerate within two hours, or one hour above 90°F (32°C).
The rice can be made a day ahead, refrigerated at 40°F (4°C) or below, and used cold.
2. Thicken the salsa mixture
Heat olive oil in a large skillet over medium heat. Add onion and cook 5–6 minutes until soft and translucent, stirring. Add garlic, cumin, paprika, and salt; cook 30 seconds.
Add salsa. Simmer 3–5 minutes, stirring, until a spoon drawn through the skillet leaves a trail that closes slowly. The target is a thick coating, not soup. Salsa brands vary in water content, so visual texture matters more than an exact minute.
Add beans and corn. Cook 4–5 minutes, stirring, until steaming throughout and excess liquid has evaporated. Taste with a clean spoon. The mixture should mound rather than spread.
3. Cool the filling rapidly
Spread bean mixture in a second shallow container. Refrigerate it and the rice promptly. Hot food can go directly into the refrigerator in shallow portions under USDA guidance, or it can be rapidly chilled in an ice bath before refrigerating.
Do not stack hot containers tightly. Leave room for refrigerator airflow and cover once active steam subsides according to safe practice. Both rice and filling must be cold before burrito assembly; warmth condenses inside the tortilla.
Wash the skillet and work surface. Assembly happens with cold ready-to-eat food.
4. Set up eight equal portions
Place eight tortillas and eight parchment sheets on the counter. Measure:
- ⅜ cup (6 tablespoons) cooked rice per tortilla, totaling 3 cups;
- ⅜ cup (6 tablespoons) bean-corn filling per tortilla, about 3 cups total depending on salsa reduction;
- 3 tablespoons shredded cheese per tortilla, totalling 1½ cups.
Measure the cooled filling before assembly. If it is slightly above or below 3 cups because the drained beans, corn, and salsa reduction vary, divide it evenly while keeping each tortilla easy to close. If it is much wetter or larger, do not force it in; reserve excess refrigerated and use within three to four days.
Warm tortillas one at a time for 10–15 seconds in a microwave under their package directions, or briefly in a dry skillet, just until flexible. Let them cool before filling. A warm flexible tortilla is useful; warm filling is not.
5. Roll tightly without tearing
Place rice in a horizontal rectangle just below center, leaving a 2-inch (5-centimeter) border. Add bean mixture, then cheese. Keep filling away from the upper edge.
Fold left and right sides inward over the filling. Lift the bottom edge up and over, tuck firmly, then roll away from you. Place seam-side down.
If a tortilla tears, move the filling to a fresh one. Do not patch a freezer burrito with a second entire tortilla unless you also revise reheat time and accept a bread duvet.
6. Wrap, label, and freeze
Wrap each burrito snugly in parchment. For extra freezer protection, place wrapped burritos together in a freezer bag, press out excess air without crushing, seal, and label with recipe name, assembly date, allergens, and “reheat to 165°F / 74°C.”
Arrange in one layer until frozen solid, then stack if the freezer permits. Keep at 0°F (-17.8°C) or below. USDA says frozen leftovers retain best quality for roughly three to four months; use these within three months for better tortilla texture.
Freezing pauses bacterial growth but does not make mishandled filling safe. If the rice or beans exceeded safe cooling time before freezing, discard them.
Microwave from frozen
Remove the freezer bag, parchment, and any foil. Wrap the burrito in a damp paper towel or place it seam-side down in a microwave-safe covered dish with a vent.
Microwave at 50% power for 2 minutes to begin thawing. Turn. Microwave at full power for 1 minute, turn again, then continue in 30-second intervals. Times vary widely by wattage and burrito density.
Let stand 1 minute. Insert an instant-read thermometer into several central points from the side. Every cold spot must reach 165°F (74°C). If not, continue in short intervals. Cut in half only after measuring; steam will be hot.
For a crisper exterior, finish the fully heated burrito in a dry skillet over medium heat for 1–2 minutes per side. This is texture work after the safe center, not a substitute for reaching it.
Oven from frozen
Heat oven to 375°F (190°C). Replace parchment with foil if it is not rated for that temperature, wrapping burrito tightly. Place on a sheet pan.
Bake approximately 45–60 minutes, turning once. Unwrap for the final 10 minutes for browning if desired. Check several central points for 165°F (74°C). Ovens and burrito thickness vary; temperature ends the process.
Reheat after refrigerator thawing
Thaw overnight in the refrigerator, never on the counter. Microwave covered, turning after 60–90 seconds, then in 30-second intervals to 165°F (74°C). Or bake wrapped at 350°F (175°C) for approximately 25–35 minutes, verifying temperature.
Add cold toppings only after reheating. Keep sour cream, avocado, and salsa below 40°F (4°C) during transport using the safe lunch packing guide.
Pack for work
For a cold-to-microwave lunch, move one frozen burrito to the refrigerator the night before. Pack it with two cold sources and refrigerate at work. Reheat at lunch.
Do not rely on a frozen burrito alone to keep an entire lunch bag safe; it will thaw. Keep fresh toppings in a separate leak-resistant cold container. Never microwave the freezer bag, ordinary foil, or unknown wrapping.
Variations
Use pinto beans in the same drained quantity. Replace corn with 2 cups diced roasted pepper, drained of excess liquid. Use cooked quinoa for rice by the same volume. For dairy-free burritos, omit cheese or use a suitable melting alternative after checking labels; slightly reduce filling if the substitute is wetter.
Do not add lettuce, raw tomato, cucumber, avocado, or sour cream before freezing. They are not being excluded from the friendship group; they simply behave badly at thawing.
For fridge-based options, make chickpea crunch wraps or lemon chicken lunch boxes. The freezer burrito owns the emergency Tuesday shift, ready when lunch planning has otherwise left the building.